
Derived from “Developing 2D Games with Unity”, Jared E Halpern (Apress December 2018)
Available through Amazon & Apress
In this post, we’ll learn how to create a camera effect commonly seen in 2D top-down games like Legend of Zelda, EarthBound, and Stardew Valley but can also work in side-scrolling games similar to Super Meat Boy or Limbo just as easily.
The end-goal is for the camera to track the player as they walk through a level, then stop when the cameras edge hits the edge of the map. The player should be able to walk right up to the edge and the camera will stay in place.
Gameplay from sample game developed in “Developing 2D Games with Unity”
Historically this effect has been achieved in Unity by writing scripts, but with Cinemachine, we can build it with just a few mouse clicks and zero code.
Requirements
The required experience level to benefit from this post is pretty minimal but you should be familiar-ish with the Unity Editor, Unity GameObjects, the Camera, and Scenes. You should be familiar with (or be willing to learn) how to install Unity Packages either from the Asset Store (← click here if you’re using Unity 2017) or through the Package Manager (← or click here to learn if you’re using Unity 2018 or 2019).
As the artwork and source in the demo game comes from the forthcoming, unreleased book - I can’t release them just yet. So you’ll have to apply these concepts to your existing game. If there is sufficient interest, I could assemble a sample game using open-source artwork and distribute it with this blog post.
(NOTE: My book has been published since this article was posted, and source for the full sample game can be found here.)
Background
Cinemachine is a powerful suite of Unity tools for procedural in-game cameras, cinematics, and cut-scenes. It was originally developed by Adam Myhill as a paid-asset in the Unity Asset Store. Unity eventually acquired Cinemachine, and Adam now works as their Head of Cinematics.
Cinemachine was made available through the Asset Store for Unity 2017.1, along with the release of Timeline. Going forward, Cinemachine will be available through the new Unity Package Manager in Unity 2018.1.
Note that older versions of Unity can still use Cinemachine from the Asset Store but it is no longer being updated and will contain no new features.
Getting Started
If you’re using Unity 2017.X, grab and install the Cinemachine package from the Asset Store. You can also find the package link here. If you’re using Unity 2018.X, use the new Package Manager to install Cinemachine instead. Unity recently announced in their blog that packages are the future of Unity in terms of distributing new features.
The first step after Cinemachine is installed is to Create a Virtual Camera.

Create a Virtual Camera
What is a Virtual Camera?
The Cinemachine documentation uses a great analogy - a Virtual Camera can be thought of as a cameraman. This cameraman controls the position and lens settings of the Main Camera. The Virtual Camera is not actually a camera itself. It can be thought of as a controller which directs the Main Camera.
Cinemachine allows for multiple Virtual Cameras in a single scene. This freedom allows for complex shots, cuts, and blends. Without Cinemachine, it could a developer or cinematographer months to set up and tweak these types of shots manually. Cinemachine even allows for procedural noise, so that no two shots will be precisely the same which gives a more natural effect. We’re barely even going to scratch the surface of what Cinemachine can do.
Creating the first Virtual Camera in a Scene will also create a component called a Cinemachine Brain. The Cinemachine Brain is the actual link between the Main Camera and the Virtual Cameras in a Scene. The Cinemachine Brain will monitor for the currently active Virtual Camera, then apply it’s state to the Unity Camera.

Controlling the Unity Camera. Every night, the same thing.
Now that we understand the components involved, lets configure our Virtual Camera.
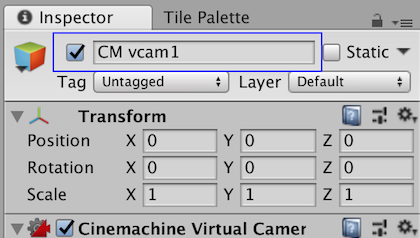
Select the Virtual Camera game object with the esoteric name, “CM vcam 1”.
You can rename this if you’d like - it’s just a Unity GameObject with a Transform Component.
When the Virtual Camera is selected, you’ll see the following properties in the Inspector.
Enable and disable a GameObject quickly
At the top we have the GameObject name and to it’s left, we have a checkbox. This checkbox is super-useful to remember because it allows you to quickly enable and disable a GameObject. We won’t be disabling a Virtual Camera in this walk-through, but remember this trick in your future Cinemachine Adventures if you want to temporarily turn-off a Virtual Camera during runtime.
Next up we have the Follow property.
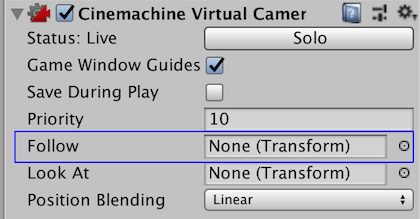
The Follow Property allows us to set the Virtual Camera Target
Drag and Drop the Player object that you want to track into the Follow property. Unity will grab a reference to the Transform component from that Player object and use that Transform as the Target to follow.
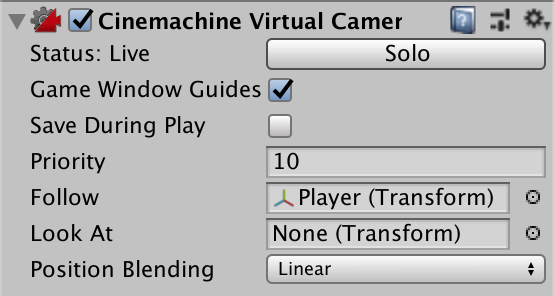
Set the Player object as the Follow target.
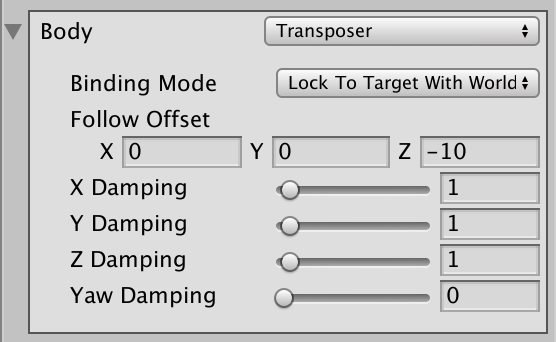
The default Virtual Camera Body setting is Transposer, which establishes a fixed relationship with the follow target and adjusts the camera position. The target moves, and the camera position moves with it. There are other 2D Body options such as the Framing Transposer, but we won’t get to that in this walk-through.
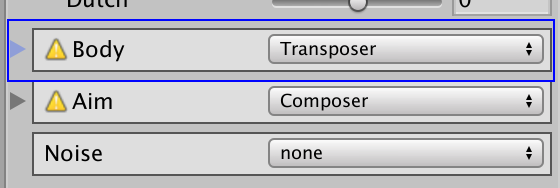
You’ll be able to configure something called Damping which determines how quickly the camera moves to catch up with a moving target.
Damping and Offset Adjustments
This next bit could be (and might be, in the future) it’s own blog entry. The Camera in 2D games is a whole topic unto itself, complete with pitfalls, art requirements, and of course the old “it depends on what you actually want to achieve with it” outlook. My book talks about how to configure the camera size for more custom and specific specific requirements.

Good advice.
For the scenario in this post, we’ll keep things simple and I’ll just tell you that with a Screen Resolution of 1280 x 720, a Pixels-Per-Unit (PPU) of 32, and artwork that looks good at 32-pixels wide, we want our camera size to be 3.75.
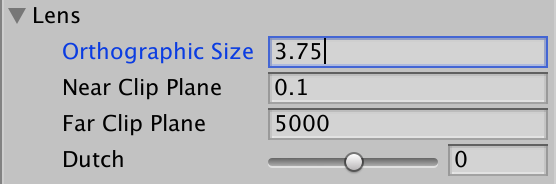
Set the Orthographic Size to be 3.75.
If you hit play now, you’d see the camera move with the target, and things won’t look half-bad.
But we can do better. If you watch the camera in the above GIF, you’ll see that it continues moving and tracking the target even as it approaches the edge of the map. If you remember how we started this journey, our goal is to have the camera stop moving when it hits the edge of the map-level while allowing the player to walk right up to the edge.
In other words, we want to confine the Virtual Camera to a certain area. In order to do that, we’ll use a Cinemachine Confiner Component.

MFW…
From the Extensions drop-down menu in the Virtual Camera, select CinemachineConfiner.
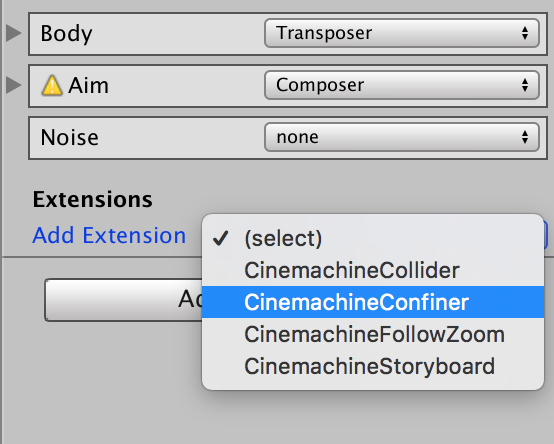
Confiners gonna confine.
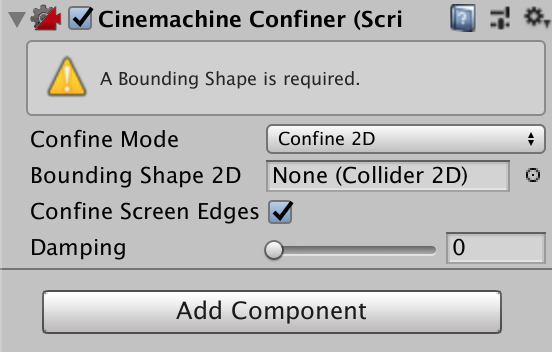
The first thing you’ll notice is a warning message that says, “A Bounding Shape is required.” We’ll walk through this in a second, but just know that a Cinemachine Confiner requires either a Polygon Collider 2D, or a Composite Collider 2D in order to know where to “stop” the Virtual Camera movement. The Collider edges represent the Virtual Camera position edges.
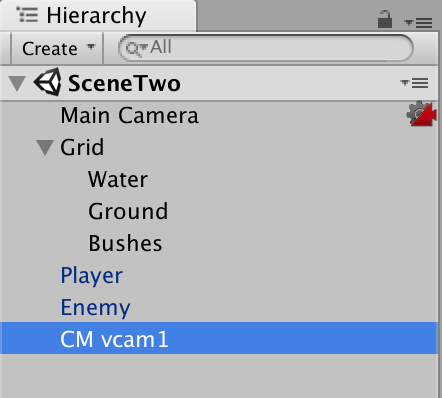
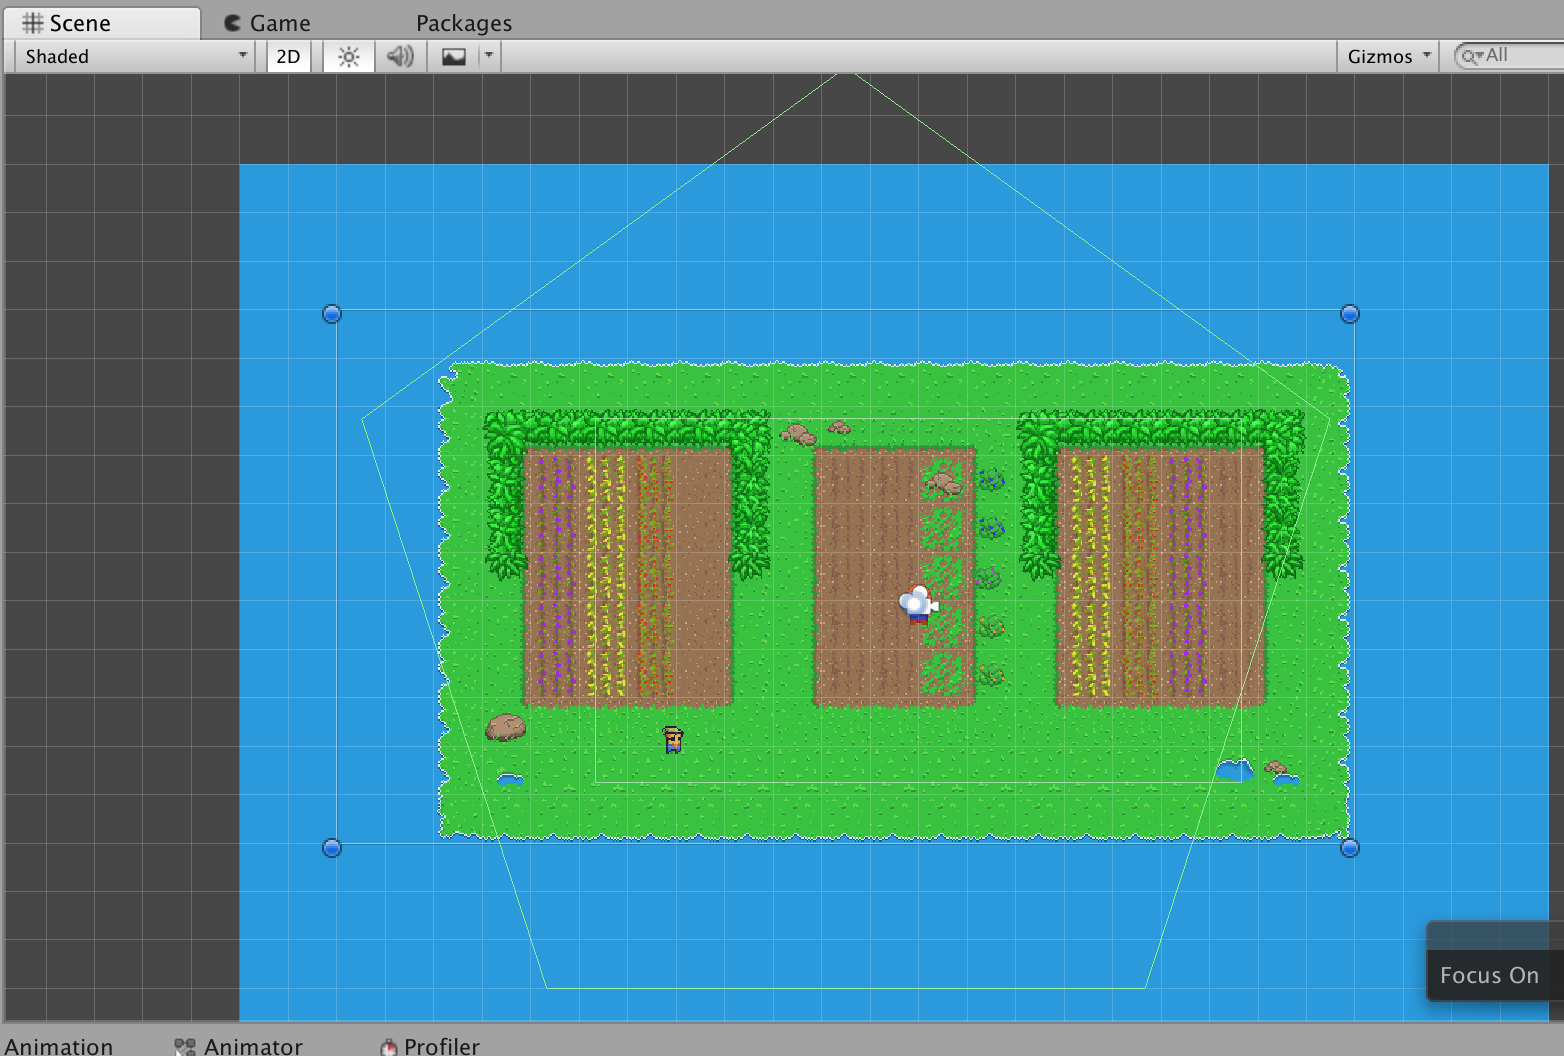
Before we set up our colliders, lets take a look at the Hierarchy view for the sample game in this post:
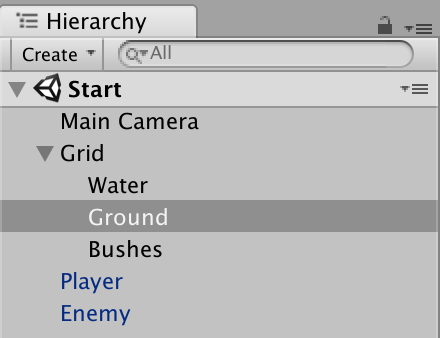
We have our Main Camera, then we have 3 Tilemaps (Water, Ground, Bushes), effectively being used as layers. Since we want to constrain the camera to the edge of the map, it makes sense to add our boundary logic, ie: our Polygon Collider 2D, to the Ground Tilemap.
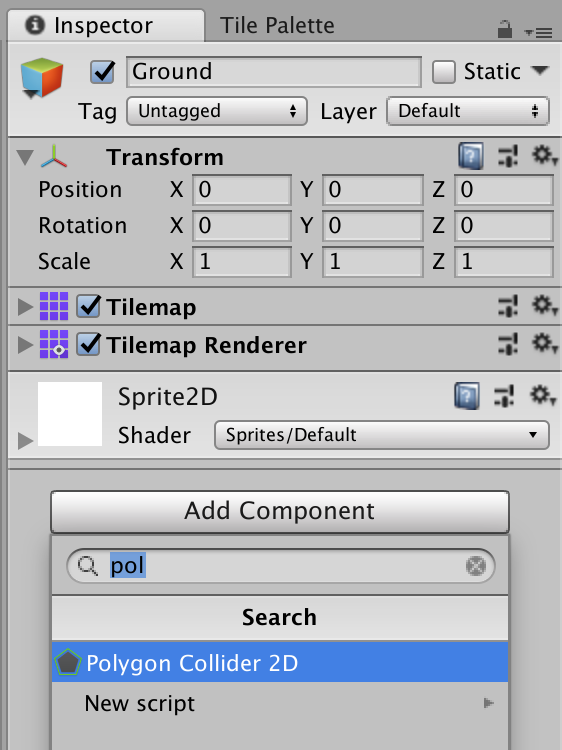
Add a Polygon Collider 2D to the Tilemap. You should get something that resembles the below. It doesn’t matter if the added Collider is big or small, because we’ll adjust it in the next step.
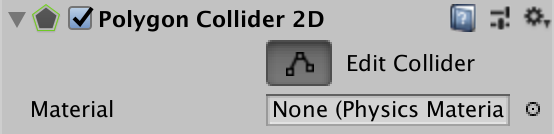
First hit the Edit Collider button in the Polygon Collider 2D component.
Now edit the bounds of your Collider. You can use your artistic sensibilities to place the edges where ever you’d like. If you’d like the Camera to keep moving just a bit past the edge of the land, so that a few squares of the water are visible, then leave some space around the edge of the land mass.
One super important thing to remember is to make sure Is Trigger is checked.
Follow instructions or the pixels will get hurt.
If you forget to do this, your player will be violently launched out of the Collider. Then again… maybe you want this to happen. I don’t wanna presume to know what kind of game you’re making.
Now we need to use this Collider in the Ground Tilemap, in our Cinemachine Confiner.
Dragging and Dropping: a 🔑skill.
Drag and drop the object containing the Collider into the Bounding Shape 2D of the Cinemachine Confiner.
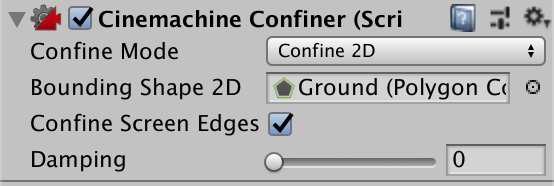
When all is said and done, the Confiner should look like the above. Another important setting is Confine Screen Edges. Otherwise the Confiner will basically ignore the Bounding Shape we just set. This setting tells our Orthographic Camera to confine the screen edges to the “volume” of the Collider.
Now hit play and walk the player around. The camera should stop at the Collider edges while the player can keep walking right up to the edge of the map.
This subtle but frequently used effect can make a big difference in the look and feel of your game. In my upcoming book, “Developing 2D Games with Unity,” we’ll cover how to customize the Virtual Camera even more, set up the Virtual Camera Body.
If you want to learn more about Unity or iOS Development, please feel free to follow me here, on Medium, as well as Twitter.
This post covers the material from a talk I gave at the Unity Users Group NYC Meetup on May 16th, 2018. The slides from that talk can be viewed here.
Thanks for reading!